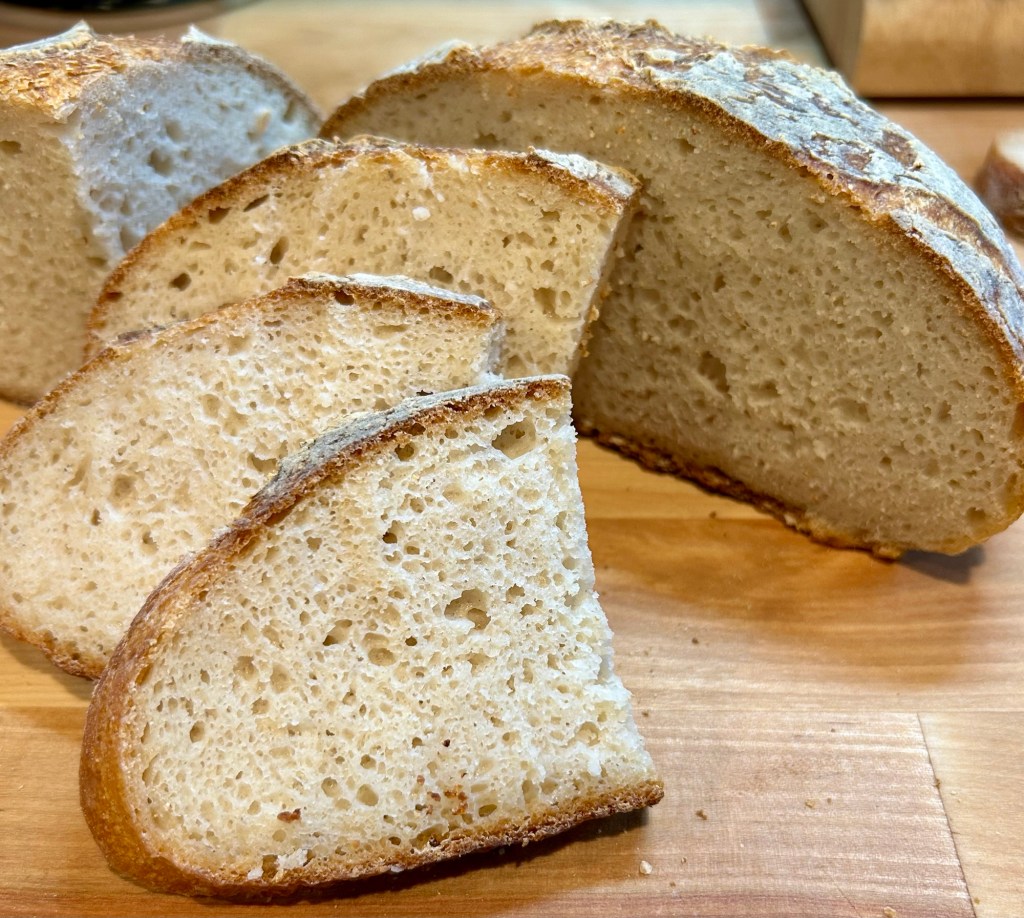
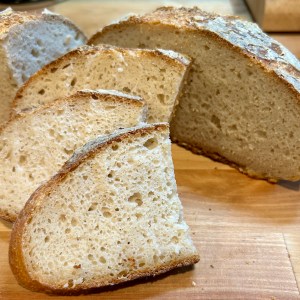
There’s something deeply grounding about pulling a golden, crackly sourdough artisan loaf from the oven—especially when it’s made with a 1:1 gluten-free flour blend that actually works. For so long, artisan-style sourdough felt out of reach for gluten-free kitchens, but this loaf proves otherwise. With the right fermentation, hydration, and technique, you can achieve a crusty exterior, an open yet tender crumb, and that signature sourdough depth of flavor—without custom flour blends or complicated steps.
This recipe was created for the everyday baker who wants a reliable, approachable gluten-free sourdough loaf using a simple 1:1 flour, while still honoring the slow, nourishing process of traditional sourdough. Whether you’re new to gluten-free sourdough or looking for a dependable artisan loaf to add to your weekly bake, this bread is designed to be both forgiving and deeply satisfying—rustic, beautiful, and meant to be shared.
Ingredients
- 290g water, warm
- 15g whole psyllium husk or 12g psyllium husk powder (what’s the difference?)
- 280g 1:1 gluten-free flour (I have tested this recipe with both Pamela’s brand & Bob’s Red Mill brand – make sure your blend contains xanthan gum)
- 180g sourdough starter (all my recipes are tested with a brown rice starter)
- 20g maple syrup
- 10g salt
- 6g baking powder or 12g apple cider vinegar*
- oil for shaping
- 2tbsp white rice for baking
*For a taller, more firm, mild-tasting loaf, use baking powder. For a softer, more sour-tasting loaf, use apple cider vinegar. I have an in-depth explanation of each choice in this post.
I source all my gluten-free flour and baking staples through Azure Standard. They offer high-quality groceries and offer the option to purchase in bulk and save. If you’d like to find a drop location near you or see what they have to offer, click here. You can also use code ‘SOURDOUGH15’ at checkout for 15% off your first order of $100 or more.
Directions
- Whisk psyllium husk into the warm water and let sit for a few minutes for a gel to form.
- In a separate bowl, mix together the other dry ingredients – flour, baking powder (if using) and salt.
- Into the psyllium husk gel, whisk the starter and maple syrup.
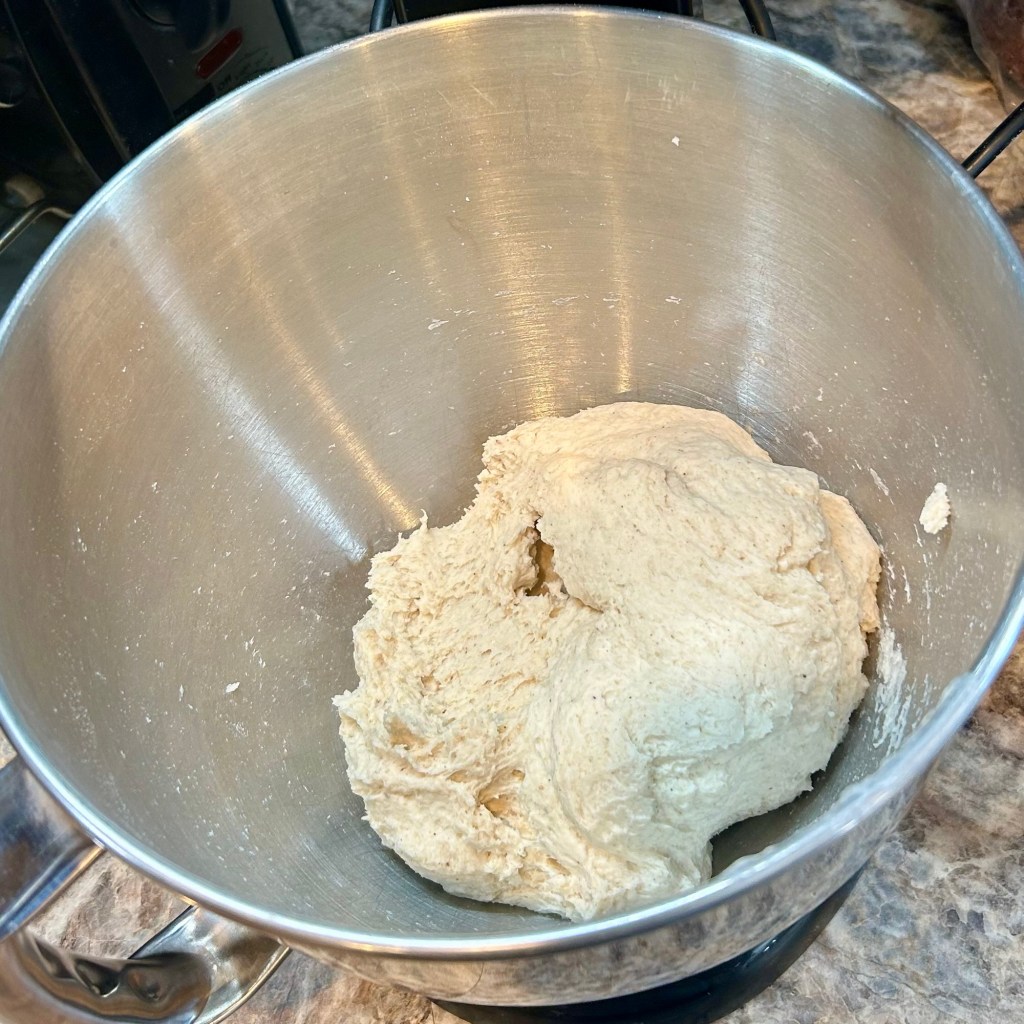
- Pour the gel mixture into the dry ingredients. Mix with an electric mixer on medium to high speed for approximately 5 minutes. Continue mixing until a very smooth dough has formed.
- Using a spatula, scrape down the edges of the bowl and form dough into a ball/pile in the bowl.
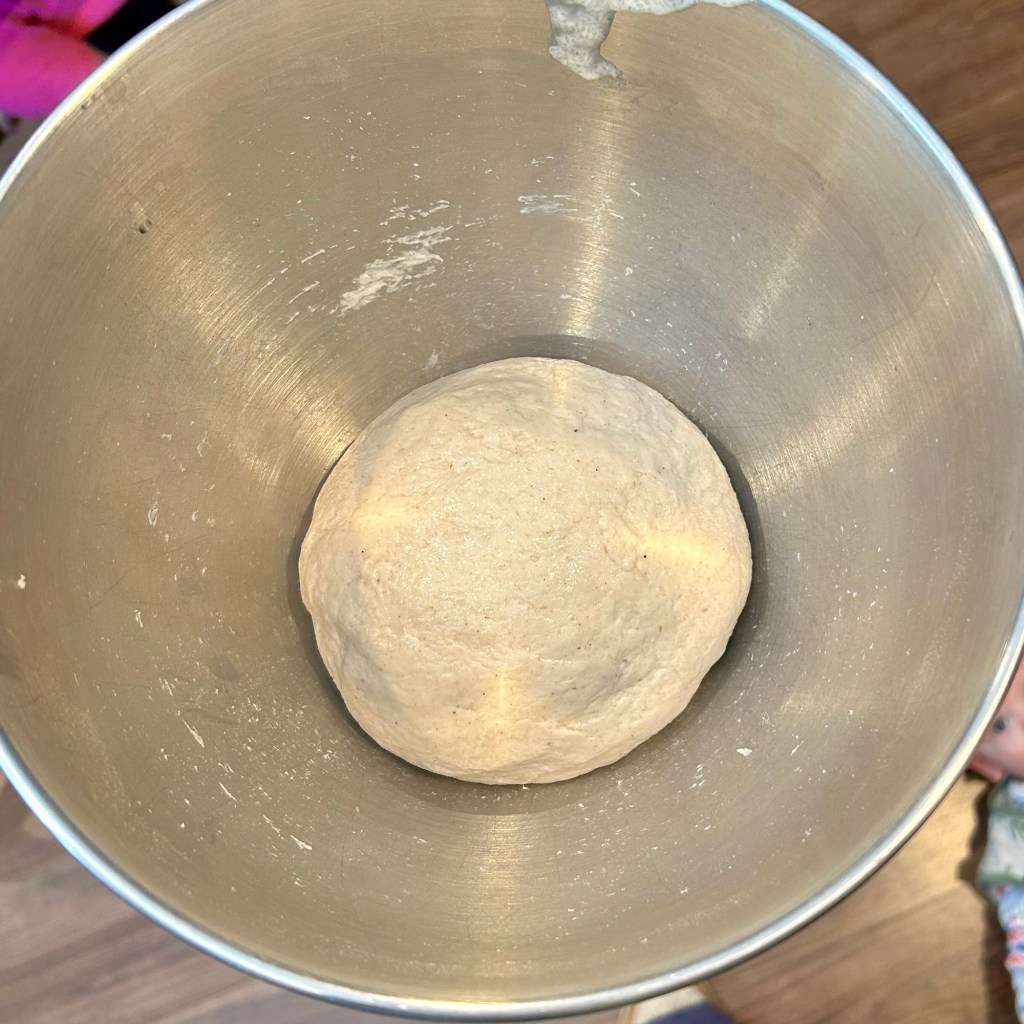
- Turn dough out of the bowl onto a lightly oiled surface (I use avocado oil). Lightly oil your hands and press the dough flat.
- Fold the dough in half and form into a ball shape.
- Pinch your seams together & place your dough ball seam-side down into a bowl.
- Cover the bowl with plastic wrap or a damp towel. Let the dough proof until it has nearly doubled. It should increase 70-90% in size. For tips on how to adjust your fermentation time, see this post. If your loaf doesn’t rise as you expect, download this free guide. It walks through the most common starter fixes.
- Once your dough has nearly doubled in size, turn your dough onto a lightly floured surface. Press your dough ball out.
- Fold the dough in half and form it into a ball.
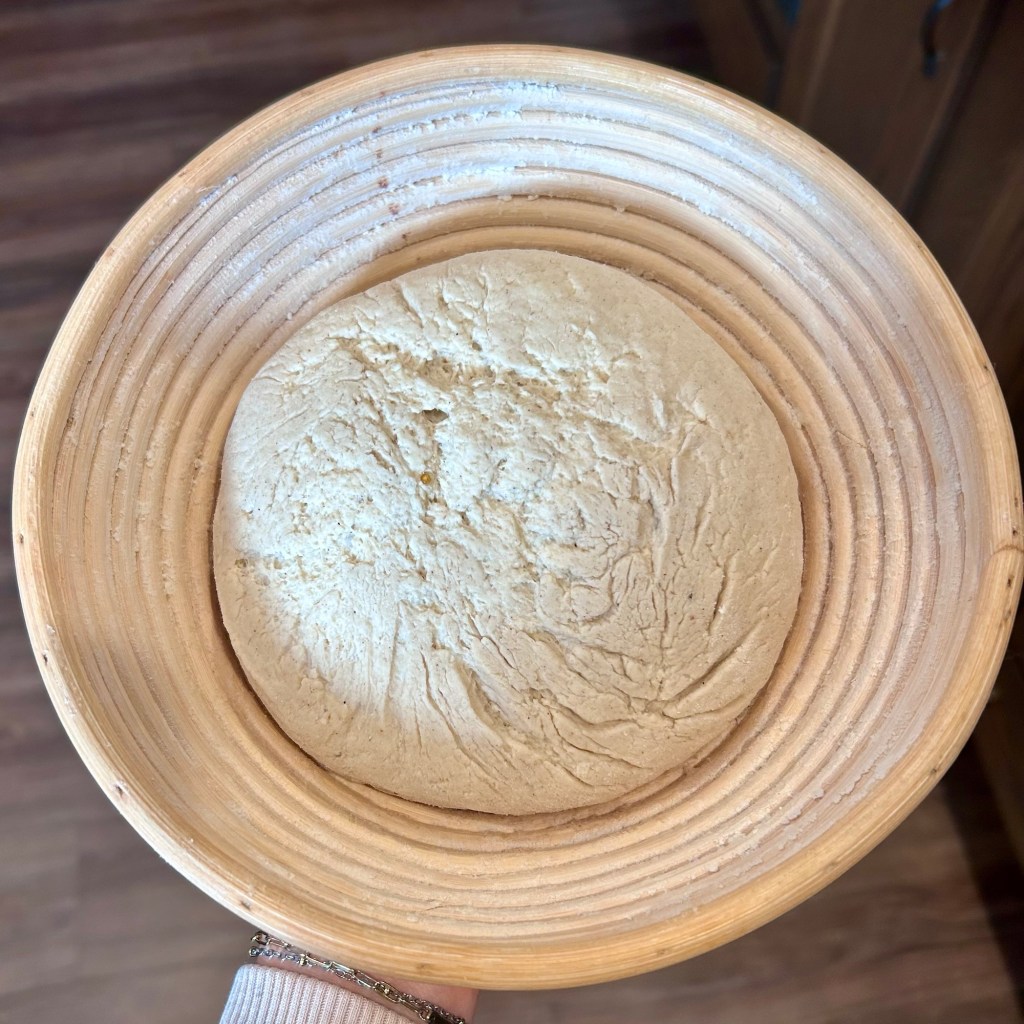
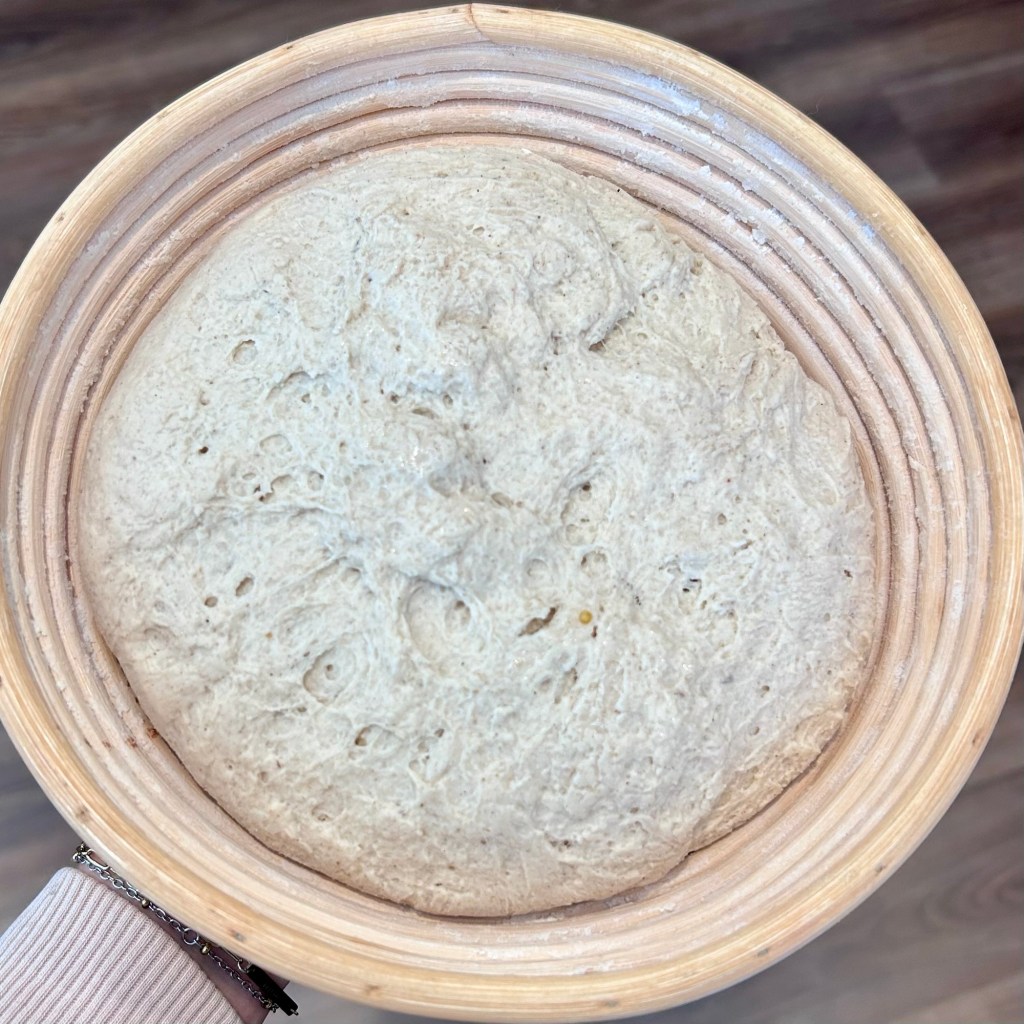
- Pinch the seams together and place the dough seam-side up in a lightly floured Banneton basket.
- Cover with greased plastic wrap or a damp towel. I prefer greased plastic wrap.
- Let the dough rise until it has nearly doubled (increasing 70-90% in size). For tips on how to adjust your fermentation time, see this post. Your dough should look puffy and expanded on top. If it looks like it is spreading out, it is almost like it is melting. These would be signs your dough is over-proofed.
- Preheat oven with Dutch oven inside to 475°F about 45 minutes before you want to bake your bread.
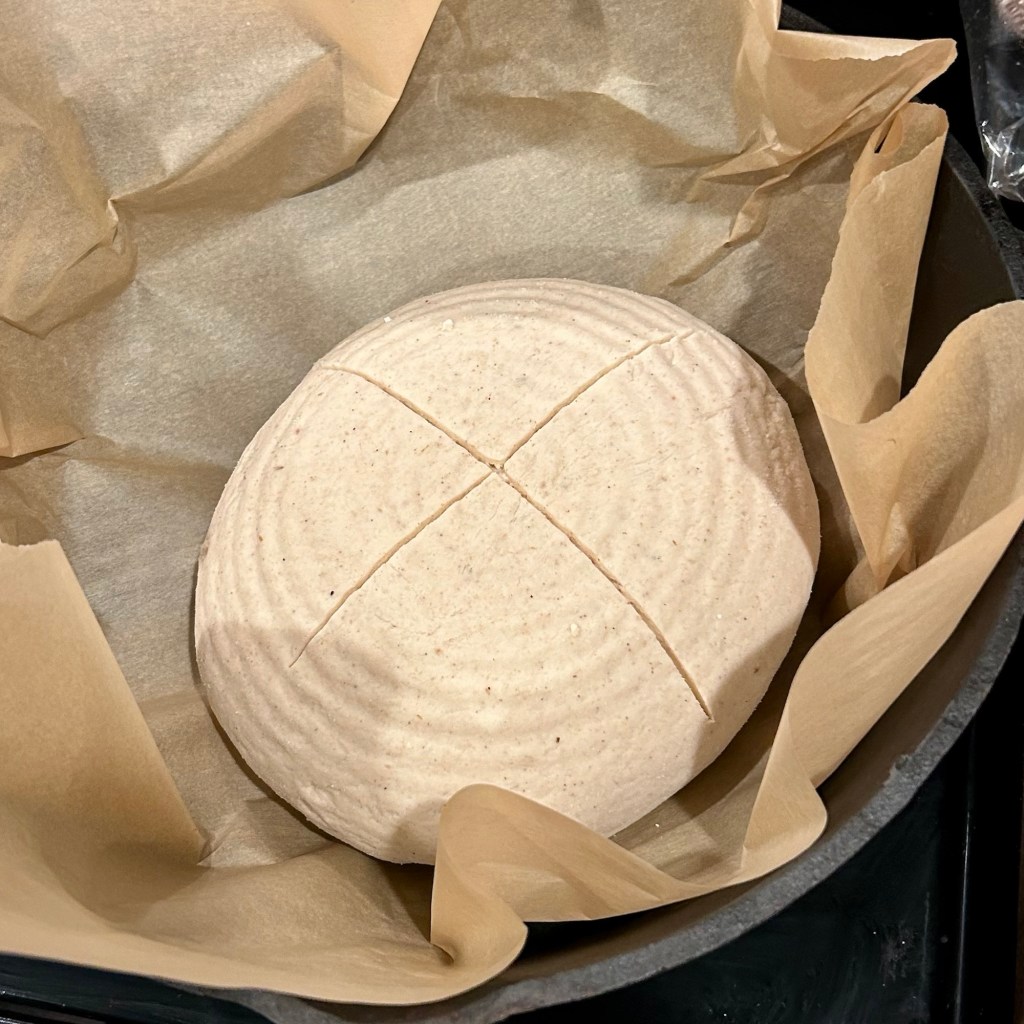
- Remove Dutch oven from the oven & sprinkle rice in the bottom of the pan.
- Using parchment paper, transfer your loaf from the Banneton basket to the Dutch oven. I prefer one clean transfer. It’s better than setting my dough on parchment paper on the counter to score.
- Score your loaf using a bread lame or sharp knife.
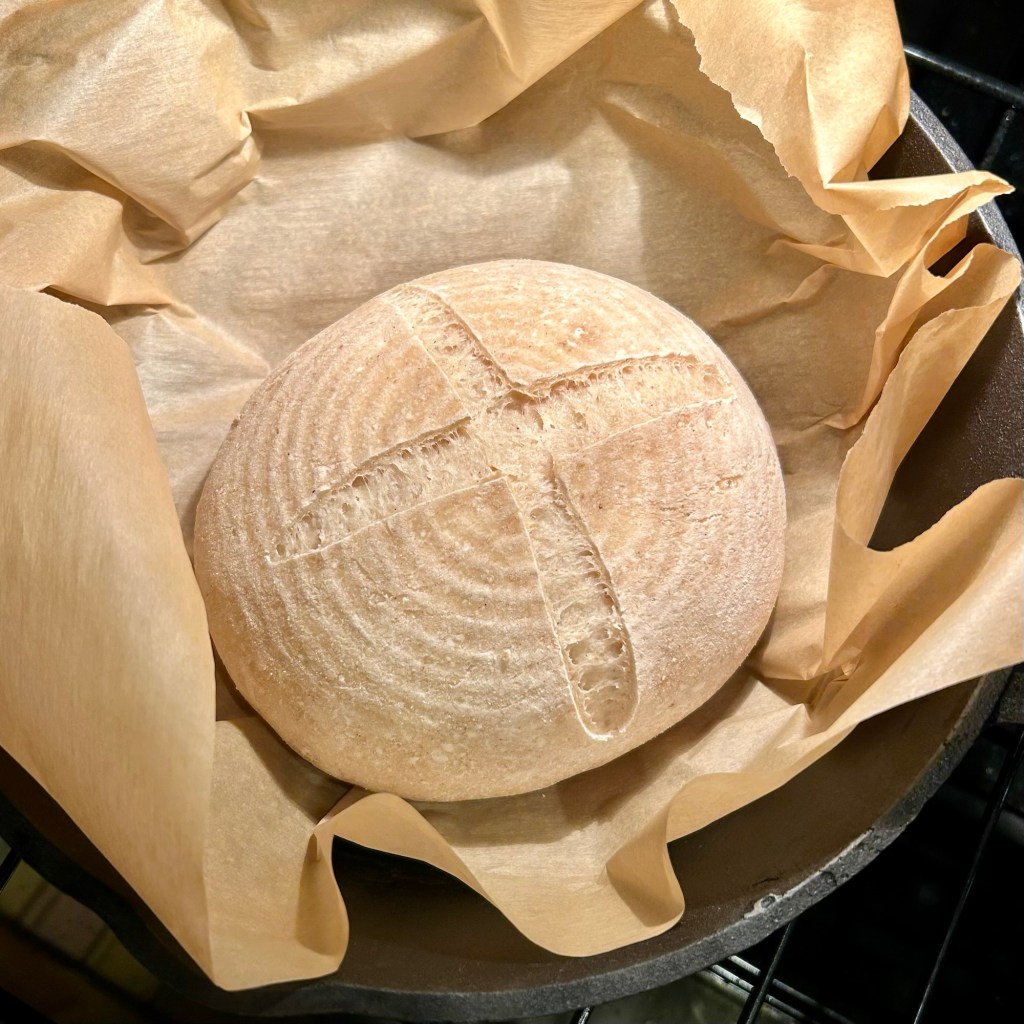
- Cover and place your Dutch oven in the oven. Bake for 20 minutes.
- Remove the cover. Drop the temperature to 450°F. Bake for another 35-40 minutes, or until the loaf is dark brown but not burnt on top. This will ensure your center is cooked and not gummy.
- Remove from Dutch oven and let cool completely before cutting. Your bread will keep cooking as it cools. If you cut too early, your bread will likely be gummy.
- Store on the counter for 2-3 days or slice and freeze.
Enjoy!
I expand on these foundational recipes inside The Recipe Club. So if you’re ready to take your bread to the next level, join here!
For more ad-free and printable sourdough tips and gluten-free recipes, join my email list here and they’ll be sent straight to you.
If you’re rebuilding your gluten-free pantry, Azure Standard is my go-to source for quality flours. Grab your first order of $100 or more for 15% off using code ‘SOURDOUGH15’ at checkout.
Simple 1:1 Flour Blend Gluten-Free Sourdough Loaf
Equipment
- 2 Large Glass Bowls
- Stand Mixer – You can mix by hand if you wish.
- Banneton Basket
- Dutch Oven
- Small Bowl for weighing psyllium husk
Ingredients
- 290 g water warm
- 15 g whole psyllium husk or 12g psyllium husk powder
- 280 g 1:1 gluten-free flour I have tested this recipe with both Pamela’s brand & Bob’s Red Mill brand – make sure your blend contains xanthan gum
- 180 g sourdough starter all my recipes are tested with a brown rice starter
- 20 g maple syrup
- 10 g salt
- 6 g baking powder or 12g apple cider vinegar For a taller, more firm, mild-tasting loaf, use baking powder. For a softer, more sour-tasting loaf, use apple cider vinegar.
- oil for shaping
- 2 tbsp white rice for baking
Instructions
- Whisk psyllium husk into the warm water and let sit for a few minutes for a gel to form.
- In a separate bowl, mix together the other dry ingredients – flour, baking powder (if using) and salt.
- Into the psyllium husk gel, whisk the starter and maple syrup.
- Pour the gel mixture into the dry ingredients. Mix with an electric mixer on medium to high speed for approximately 5 minutes. Continue mixing until a very smooth dough has formed.
- Using a spatula, scrape down the edges of the bowl and form dough into a ball/pile in the bowl.
- Turn dough out of the bowl onto a lightly oiled surface (I use avocado oil). Lightly oil your hands and press the dough flat.
- Fold the dough in half and form into a ball shape.
- Pinch your seams together & place your dough ball seam-side down into a bowl.
- Cover the bowl with plastic wrap or a damp towel. Let the dough proof until it has nearly doubled. It should increase 70-90% in size.
- Once your dough has nearly doubled in size, turn your dough onto a lightly floured surface. Press your dough ball out.
- Fold the dough in half and form it into a ball.
- Pinch the seams together and place the dough seam-side up in a lightly floured Banneton basket.
- Cover with greased plastic wrap or a damp towel. I prefer greased plastic wrap.
- Let the dough rise until it has nearly doubled (increasing 70-90% in size).
- Preheat oven with Dutch oven inside to 475°F about 45 minutes before you want to bake your bread.
- Remove Dutch oven from the oven & sprinkle rice in the bottom of the pan.
- Using parchment paper, transfer your loaf from the Banneton basket to the Dutch oven. I prefer one clean transfer. It’s better than setting my dough on parchment paper on the counter to score.
- Score your loaf using a bread lame or sharp knife.
- Cover and place your Dutch oven in the oven. Bake for 20 minutes.
- Remove the cover. Drop the temperature to 450°F. Bake for another 35-40 minutes, or until the loaf is dark brown but not burnt on top. This will ensure your center is cooked and not gummy.
- Remove from Dutch oven and let cool completely before cutting. Your bread will keep cooking as it cools. If you cut too early, your bread will likely be gummy.
- Store on the counter for 2-3 days or slice and freeze.
2 responses to “Simple 1:1 Flour Blend Gluten-Free Sourdough Loaf”
Thank you for sharing this recipe! I’ve been looking for a gluten free sourdough bread recipe that doesn’t use eggs, so I can’t wait to make this. Question: I am new to sourdough bread making, do you need to use a Banneton basket for the 2nd rise? Can you use a regular bowl again?
You’re so welcome! I hope it blesses you greatly! You can definitely use another bowl than just a banneton basket. You will probably want to use a tea towel to line your bowl/ flour like you would with a banneton basket liner. I don’t personally use a liner in my banneton basket, but if you’re going the route of a standard bowl, a flowered tea towel liner would be the route to go.