Homestead on the hill
Simple & delicious gluten-free food.
This post contains affiliate links. If you purchase through these links, I may earn a small commission at no extra cost to you.
Starting a gluten-free sourdough starter can feel intimidating—especially if you’ve been told it’s finicky, unpredictable, or harder than traditional wheat starters. The truth? With the right flour, a simple feeding routine, and a little patience, a gluten-free starter can be just as strong, bubbly, and reliable as any other. You don’t need specialty tools or complicated ratios—just a clear understanding of what your starter needs to thrive.
In this post, I’ll walk you step by step through how to create a healthy, active gluten-free starter from scratch, explaining the why behind each step so you can confidently troubleshoot along the way. Whether you’re baking for health reasons, allergy safety, or simply choosing to avoid gluten, this starter will become the foundation for naturally fermented breads that are nourishing, flavorful, and truly gluten-free from the very beginning.
Want more ad-free and printable sourdough tips and gluten-free recipes? Join my email list here and they’ll be sent straight to you.
Ingredients
- Brown Rice Flour
- Water
I source all my gluten-free flour and baking staples through Azure Standard. They offer high-quality groceries and offer the option to purchase in bulk and save. If you’d like to find a drop location near you or see what they have to offer, click here.
Thinking about substituting flours? Because gluten-free sourdough behaves differently than traditional bread, not all swaps work the same. I walk through the best gluten-free flour swaps in the Gluten-Free Sourdough Beginner’s Guide, available here.
Directions
You have two choices when getting started (I’ve done both):
- Start completely from scratch.
- Get some dried starter to speed up the process.
We are going to focus on option 1, but know that adding dried starter will just speed up this process. If you choose to purchase a dried starter from my shop, you will receive step-by-step rehydration instructions to follow.
If you don’t already have a Digital Kitchen Scale, you will want to get one.
Let’s Get Your Starter Going
Day 1: To a clean mason jar, add 50g brown rice flour and 45-55g water. Mix together for a thick pancake batter consistency (start with 45g and add more as needed). Alternatively, you can feed with a ¼ cup of flour and a ¼ cup of water if you don’t have a kitchen scale quite yet. If you are using dried starter to kickstart your fermentation, add that in as well. For a closer look at the consistency you are going for, please refer to my “Getting Started” video.
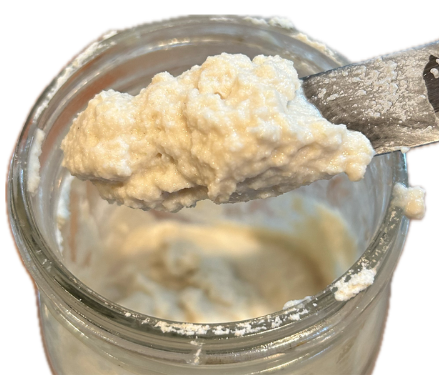
Here is a look at the consistency you want to achieve. It typically takes a few more grams of water to achieve the thick pancake batter consistency that rises well and isn’t too dry. If your starter appears runny (runs right off your mixing spoon), you will need to reduce your hydration and take note for future feedings. Hydration can be affected by the type, brand, or grind of flour.
Let sit for 24 hours. You may stir once or twice during that 24 hours to help activation.
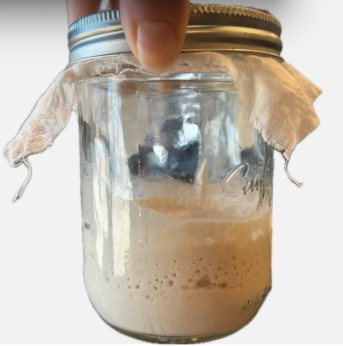
24 Hours after Day 1, just before feeding on Day 2. You may start to see tiny bubbles like the ones in this starter.
Even if you don’t see bubbles quite yet, feed your starter after 24 hours.
Day 2: Feed your starter 25g of brown rice flour and 25g water (adjusting + or – a few grams if too dry to stir evenly or too wet that it is runny). Alternatively you can feed 1/8 cup of flour and 1/8 cup water if you do not have a kitchen scale yet. Video instructions here.
Let sit for 12-24 hours. If you see bubbles at 12 hours, go ahead and feed, otherwise wait until 24 hours.
Day 3: Repeat day 2 feeding. Video instructions here.

“Wild” yeast are what are going to get into your starter and eat the sugars (your flour) to produce the gas that makes your starter bubble and bread rise! These yeast multiply as long as you continue to feed your starter and thus create a stronger and more robust ferment. When your starter is brand new, there are not as many yeast, so the flour isn’t getting “spent” as quickly, which is why you may not need to feed it as much right away. The more active your starter becomes, the hungrier those yeast get!
Day 4 Feeding and beyond is going to depend on if your starter has become active or not. video instruction here.
Not active yet? (no bubbles) Continue with feedings as you did on day 2/3.
Active? (visible bubbles) Start feeding as described below.
While a typical wheat starter is often fed at a 2:1:1 ratio of starter:flour:water, feeding a gluten-free starter often performs best at a 1:1:1 ratio.
The main thing is that you’re feeding with a 1:1 ratio of flour:water (approximately). As stated earlier, I typically give my starter a few more grams of water than flour to maintain a thick batter consistency. This may vary slightly depending on your flour. Adjust your water by a few grams (+ or -) as needed.

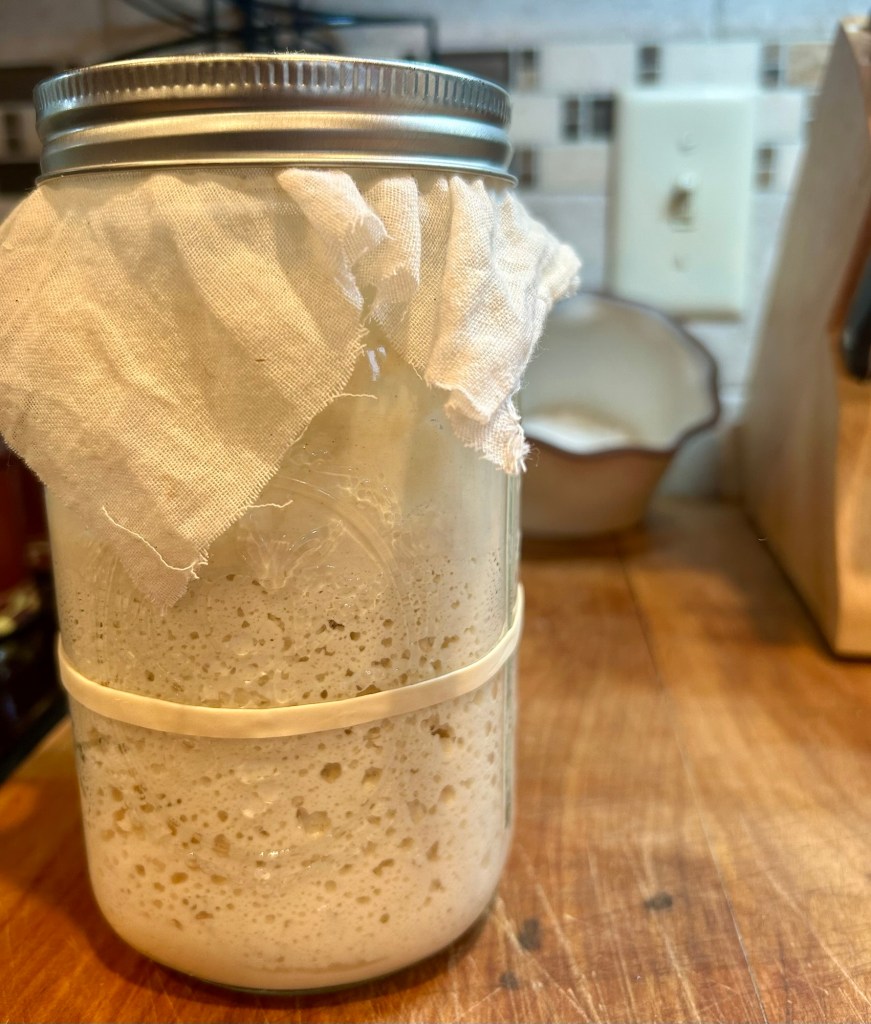
A healthy active starter will double in size several hours after feeding. Use a band or tie to easily mark where your starter line is immediately after feeding for a visual reference of when it has doubled.
When to discard? You don’t truly need to discard right away. You want to build your starter up to an amount that works for the bread recipes you’re hoping to make. If your starter is getting quite large, by all means feel free to discard as much as you need to maintain a healthy feeding and not use a ton of flour. That discard can be used for making crackers, pizza crust, tortillas, and so much more (scroll down for my pizza crust recipe tutorial). Store your discarded starter in the fridge in an air-tight container.
Because gluten-free starters can get sour quite quickly, for a less “sour” bread, you can feed at a 1:2:2 ratio, meaning you’re using half as much starter as flour and water. I wouldn’t do this consistently, but it will help bring the flavor profile back down (less sour).
The goal? That you are getting a nice bubbly starter than can double in size when you want to bake bread! Typically it will take 7-10 days to establish a healthy starter. Video instruction here.
Something not quite right? Maybe your starter isn’t doubling, smells “off” or keeps building a lot of liquid. I go through some troubleshooting steps in my free guide you can download.
Want more ad-free and printable sourdough tips and gluten-free recipes? Join my email list here and they’ll be sent straight to you.
Maintaining Your Starter
Once you have a bubbly starter, it is time to get on a consistent feeding schedule. These are not rules, but simply guidelines that I find work well.
If I do not plan to bake bread the next day, I feed my starter once a day. This feeding usually consists of a 1:1:1 ratio of starter:flour:water. If I am feeling like I have to much starter and discard, I may back this down to a 2:1:1 ratio for one or two feedings.
If I plan to bake bread that day or the next day, I feed my starter twice a day. I will feed it in the morning around 7am 100g starter : 100g flour : 100-110g water for a thick pancake batter consistency. This starter typically doubles in size by noon and is ready to be used. I then feed again sometime after mixing up my bread before bedtime (yes, that’s a large span of time but it truly is okay to feed anywhere in that timeframe).
If I do not plan to bake bread for 4 or more days, I may choose to refrigerate my starter. I then feed it at a 1:1:1 ratio and within the hour place it in the fridge. It is recommended to feed a starter once a week while it is in the refrigerator, but in my experience, that is not truly necessary. You can feed it every now and again as you think of it, or leave it for months. Just know the longer it goes without feeding the longer it may take to revive it.
To revive your starter from the fridge, simply let it sit on the counter to warm to room temperature, remove any dark colored flour from the top, and feed. Feed every 12-24 hours until you have a starter that doubles in size and is ready to bake bread. Discard starter as you wish to keep the volume manageable.
Grab a recipe to bake your FIRST LOAF!
Congratulations! You have built a starter you can use to make so many delicious naturally fermented recipes for your family!
Want more ad-free and printable sourdough tips and gluten-free recipes? Join my email list here and they’ll be sent straight to you. You’ll stay in the loop for when all the latest recipes are posted!
2 responses to “Step-by-Step Guide to Gluten-Free Sourdough Starter Success”
Can I use white rice flour?
White rice flour won’t hold its structure as well as the brown rice flour will. So you may not accomplish the same rise with white rice flour.